
I started working out in a commercial gym in 2018. Before that, I worked out in a park doing calisthenics, lifted kettle bells in my apartment, and ran on trails. And before that, all I did was hike trails in the PNW. So long as you move your body, you can do pretty much anything. With that being said, the number one question I see in my DMs is, “what gear are you using?”
Here it is. All the gear in my “pain cave” and how you can create your very own pain cave. The pain cave is a mental state you go to when exercise is hard.
Also, these are affiliate links so I get a slight kickback when you use these links. If you’ve seen me use a piece of equipment that is not on this list then contact me here or through a DM and I’ll try to add it into the list. Without further ado, below is a sample set of equipment so you can create your very own pain cave…
Squat rack
I am not a powerlifter, but I love the three main lifts; squat, bench, and deadlift. Similarly, I’m a big fan of overhead press. To do these lifts, I needed some type of rack or stand. I had to make a choice between a full rack, half rack, or a barbell stand. I went with a full rack for a few reasons.
Starting off with reason number 1, the full rack on amazon was cheap, well rated, and surprisingly durable (here’s a link to Garage Gym Reviews putting it through an insane stress test including dropping 700 pounds on the safeties). When I purchased mine, the full rack was around $200. The price has increased recently as creating a home gym became quite popular during the pandy. I’ve used mine for over 4 years with the heaviest lift being squats @ 450.
Secondly I wanted to be able to do pull ups and overhead press. Unsurprisingly, these requirements turned my options to either a full or half rack. Most half racks that supported pull ups are quite expensive and out of my budget.
Finally, the last reason was safety. I knew that a full rack would allow me to do squats with the safeties up and the bar wouldn’t roll anywhere. Moreover, everyone has seen a gymfail on YouTube or Instagram of someone squatting in a half racks or stand. Obviously, I’d like to avoid a feature on one of those channels.

Barbell and Plates
I am a pretty basic guy. All I wanted in my barbell was inexpensive and durable. York had exactly what I was looking for. A 300 lb set with a 7′ Olympic barbell made from steel. Since the barbell is rated for 1000 lbs I’ll likely never need to upgrade. No affiliate link for this set. This link is the exact set I purchased. At the time, the deal was incredible. I paid ~$0.95/lb. At the time, weights were going for $3-5/lb.
https://yorkbarbell.com/product/2-cast-iron-olympic-plate-set/
Extra 45lb Plates
After purchasing the 300 lb set, I knew I’d need to add 45 lb plates. During my time at a commercial gym, I could squat and deadlift 315 and I had plans to go past that. As such I knew I’d need some extra 45lb plates. In 2020, 45 lb plates were incredibly rare. York, Rogue, Eleiko, etc. were all out of stock. Companies started using lottery systems to sell plates to combat bots. Meanwhile, I snagged two of the following 45 lb 2 piece set on Amazon. This was an extra 180 lbs of weights for ~$1.8/lb WITH free shipping through Amazon prime.
*note* Companies are now able to offer significantly cheaper $/lb plates. However, shipping costs are typically exorbitant. If you’re going to buy from a company directly, I recommend ordering a lot so you can get free shipping or only eat the shipping cost once.
Adjustable Dumbbells
Dumbbels are the bane of home gyms. Expensive and demanding extensive space, full dumbbell racks are often out of budget cost-wise and spatially for home gym owners. Enter adjustable dumbbells, a space saving and simple solution to an otherwise expensive problem.
When considering what to purchase, I recommend the following criteria: cost, exercise suitability, weight/weight increment, and durability. When considering these factors, I like to compare the number of dumbbells with the purchase price. For example, if an adjustable dumbbell set will replace 10 dumbbells then I compare the cost of the 10 dumbbells to the cost of the set. After cost, I like to compare the versatility of an individual dumbbell versus the adjustable dumbbell — don’t overlook this!
Comparing Adjustable Dumbbells
Comparatively, some companies design their adjustable dumbbells for lifts that do not require leg bracing, such as dumbbell overhead press and dumbbell bench. Typically, dumbbells have flat, evenly distributed weight. However, adjustable dumbbells like spinlock and BowFlex have pointy edges that can tear into your quadriceps. After considering exercise suitability, I recommend thinking about how much weight you currently need, and how much weight you’ll desire after you hit your goals.
Now it’s time to consider weight. In the first analysis, we compared cost and the number of replaced dumbbells. Now consider if the dumbbells replaced are the dumbbells you need to replace. Typically commerical gyms have dumbbells from 5-150 lbs. Rarely will you see a gym attendee frequent the top end of the spectrum. Generally, your home gym sweetspot is somewhere in the middle of these extremes.
Lastly, review durability. If you have the funds then you can directly compare the adjustable dumbbells. However, if you’re like me then you need to rely on other people’s reviews. I love GarageGymReviews for this purpose. Don’t just trust reviewers, investigate build quality and user reviews.
My Adjustable Dumbbell Choice
All of these factors considered, I chose NuoBells. With middle to high-end cost, perfect exercise suitability, wide weight increment range, and nicely durable with solid build quality, I’ve been very pleased with my decision.

Kettle bells
I have two 20lb and one 40lb kettle bell. I utilize kettlebells for VO2 max training. My experience is that they are all pretty much the same and go for the cheapest you can find. Grip can always be improved with chalk.
Pulley System
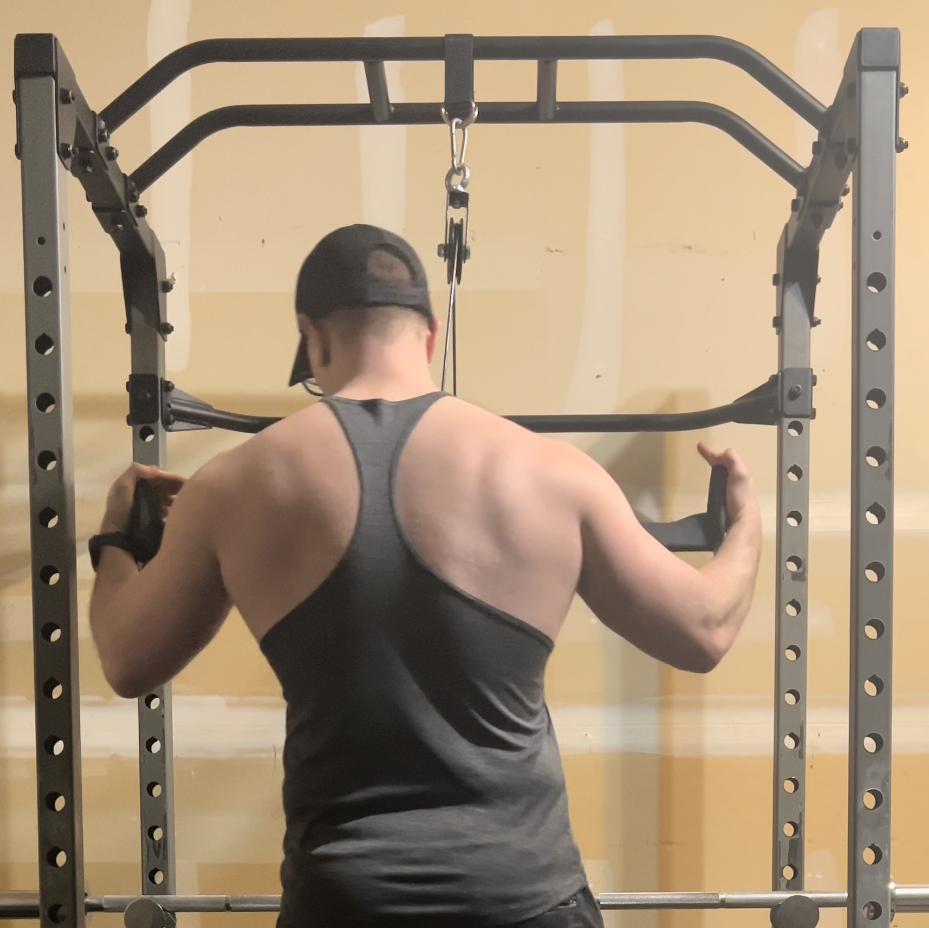
The number 1 question I get asked is, what equipment are you using for lat pull downs? It’s a pulley, nylon band, and steel braided cable. You can get them from pretty much any hardware store or buy a complete pulley system. I purchased a complete pulley system as it also came with some attachments that I knew I’d want.
Here’s a complete system similar to the one I purchased.
Lat pull down attachments
After the basic attachments that were included in the Pulley System, I knew I’d need a set of lat pull down attachments. If you’ve been following me on IG, you know I’m really focused on improving my bench press weight and growing some wings.
To do that, I wanted two main types of lat pull down bars — neutral grip and straight bar; the neutral grip bars are used to to improve deep lat stretch and straight bar for reverse grip.
Neutral Grip Bars
For the neutral grip bars, I highly recommend getting a set. Reason being, the lat stretch I get from wide neutral grip and close neutral grip is completely different. With wide neutral grip, I get a huge stretch in both my lats and rear delts. With close neutral grip, you can get a big stretch in the deepest part of the lat with minimal shoulder discomfort.
I didn’t go with a multigrip pulldown attachment because all the ones I could find that were durable were extremely heavy. You could account for this with the weight on the stack, but it just feel like an extra calculation I’d like to avoid.
Straight Bar
Now with the straight bar, my focus was on attenuating extra bicep activation. I tend to use reverse grip lat pull downs on my back and bi days to warmup both my back and my biceps in one movement. The straight bar also hits the upper back when doing wide grip lat pull downs. For that reason, I definitely recommend getting a long (40+ inch) bar that bends on the ends for wrist comfort.
Gym Flooring
One of the most important aspects of your pain cave is the flooring. For me, I’m in the gym which means I’m above concrete that’s a part of the house’s foundation. It’s very important to not crack the cement otherwise it’s a fairly costly repair.
With that being said, I don’t do any olympic lifts or drop weights. So for me, all I needed was something to protect the weights and the concrete. So, I went with rubber-foam interconnecting horse stall mats. It’s perfectly fine for my use case. The alternative, but slightly more expensive and more durable is rubber horse stall mats.
If you’re going to do anything with olympic lifts/plan on dropping weights, you’ll really want rubber horse stall mats and not the rubber-foam. Rubber-foam is quite good, but can be “sliced” by dropped weights.